ServiceNow is a cloud-based company that provides both Platform as a Service (PaaS) and Software as a Service (SaaS) offerings via it’s Now Platform in a single tenant architecture, which means that each customer gets their own instance on which to run apps instead of sharing resources. The company specializes in IT services management (ITSM), IT operations management (ITOM) and IT business management (ITBM), allowing users to manage projects, teams and customer interactions via a variety of apps and plugins.
ServiceNow can integrate with other tools easily. In this post I will demonstrate how to integrate ServiceNow with Oracle Identity Cloud Service – IDCS.
Obtain the Signing Certificate from Identity Provider (IdP) metadata
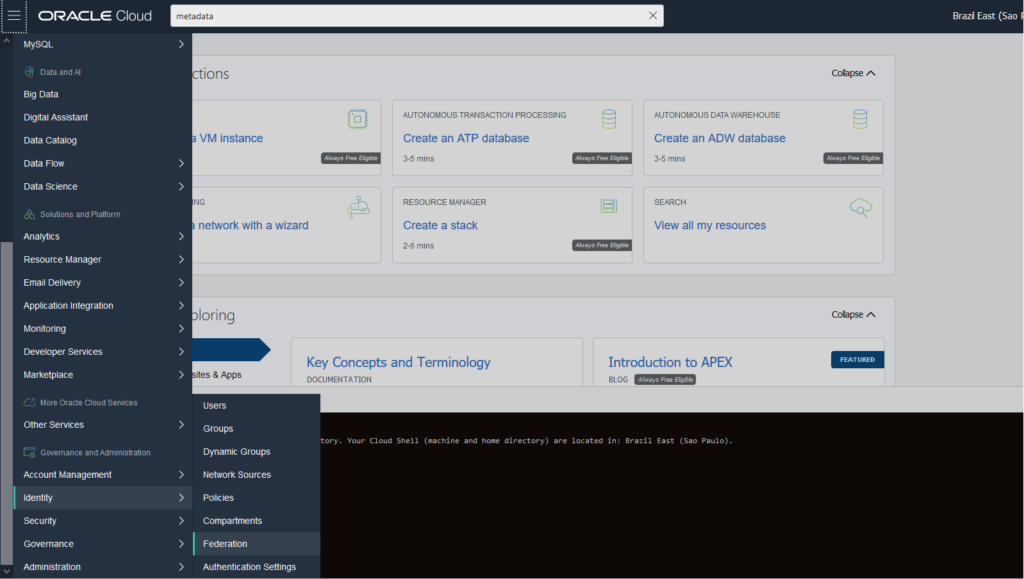
1. Log into the Oracle Cloud. Select the “Identity > Federation” option:
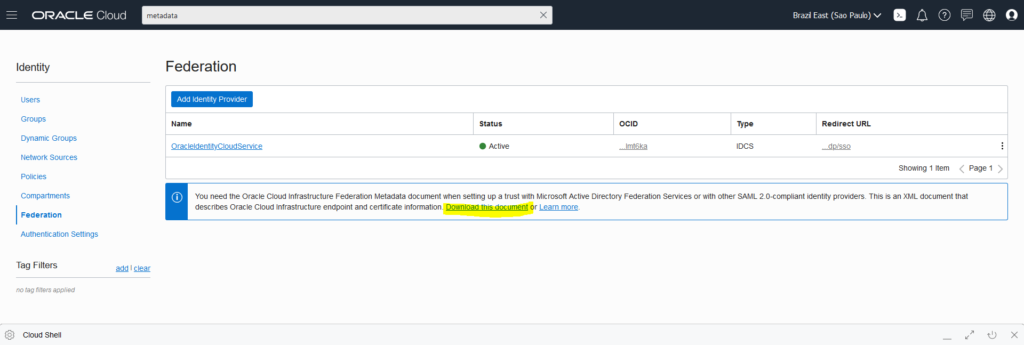
2. Access the Identity Provider (IdP) metadata in “Download this document”
3. Locate and make note of the content between the “ds:X509Certificate” tags. This is the IdP signing certificate.

4. Add “Begin Certificate” at the beginning and “End Certificate” at the end of the Certificate contente, in text editor, and salve the file. Use this certificate content later during SSO configuration in ServiceNow.

Configuring SSO for ServiceNow
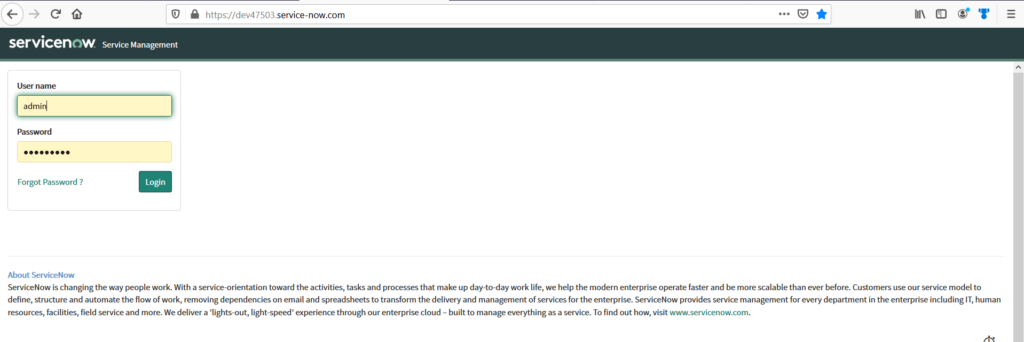
1. Access ServiceNow as an Administrator
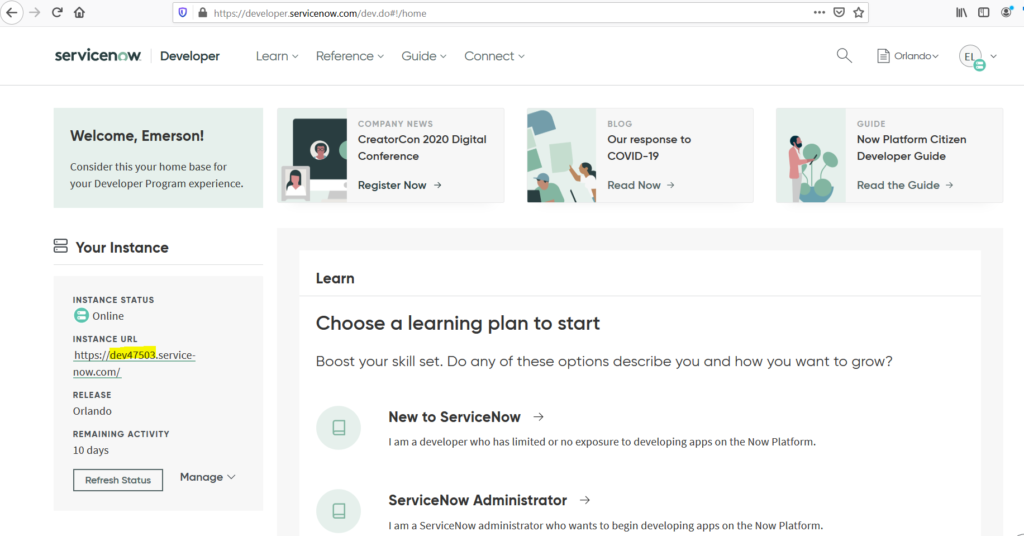
2. In “INSTANCE URL” make note of the highlighted instance ID (dev47503). You will need it during ServiceNow Registration in Oracle Identity Cloud Service.
3. Click in “INSTANCE URL”and access ServiceNow as an Admin
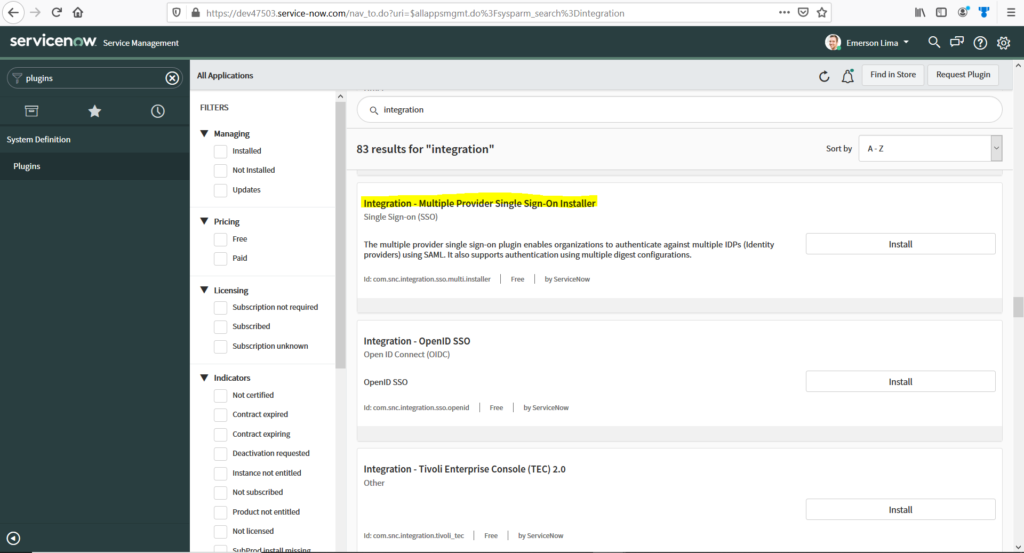
4. Search and click Plugins in the left navigation menu

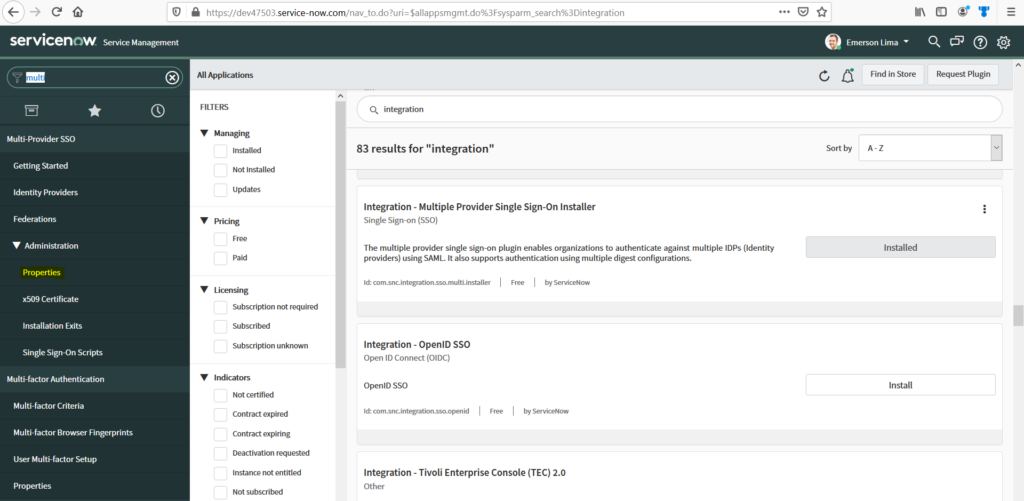
5. Search for “Integration” in the Plugins search field. Locate and click “Integration – Multiple Provider Single Sign-On Installer”. Click “Install”
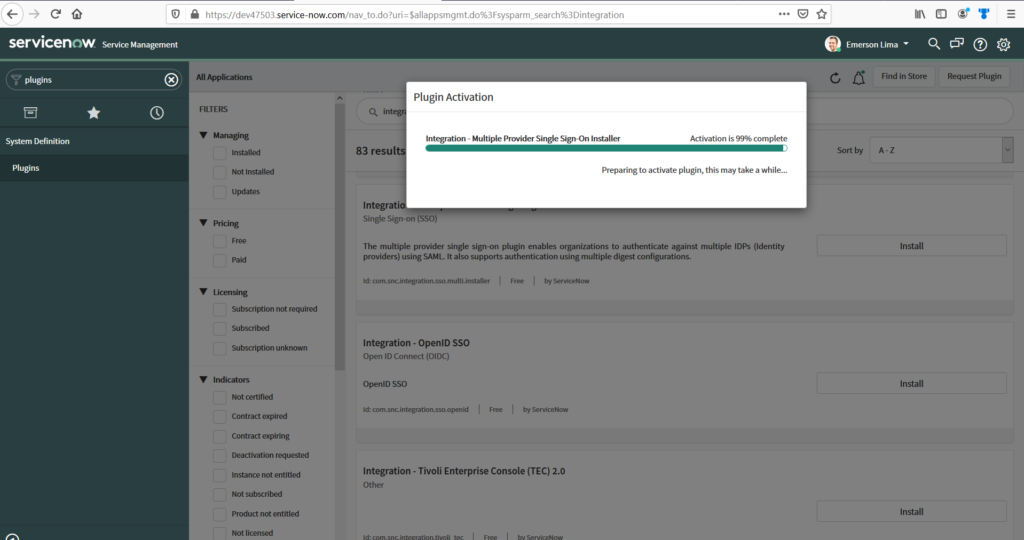
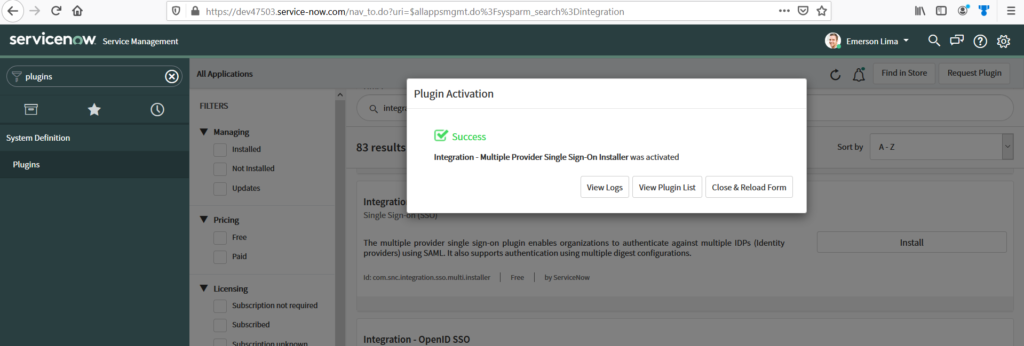
6. The installation progress bar will be displayed.
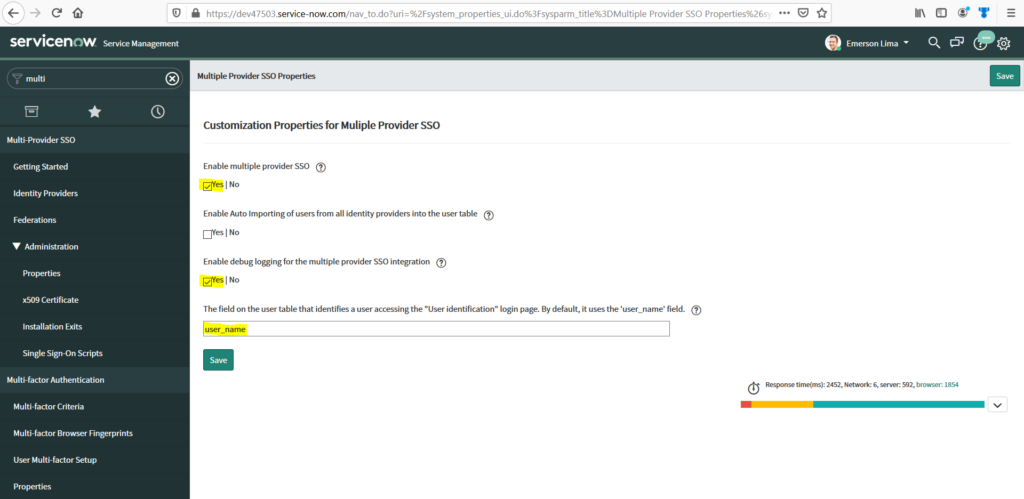
7. Search for Mult-Provider SSO in the left navigation menu, and then click Properties:
8. Make Yes to “Enable multiple provider SSO” and “Enable debug logging for the multiple provider SSO integration”. Enter user_name in the text box and click and “Save”
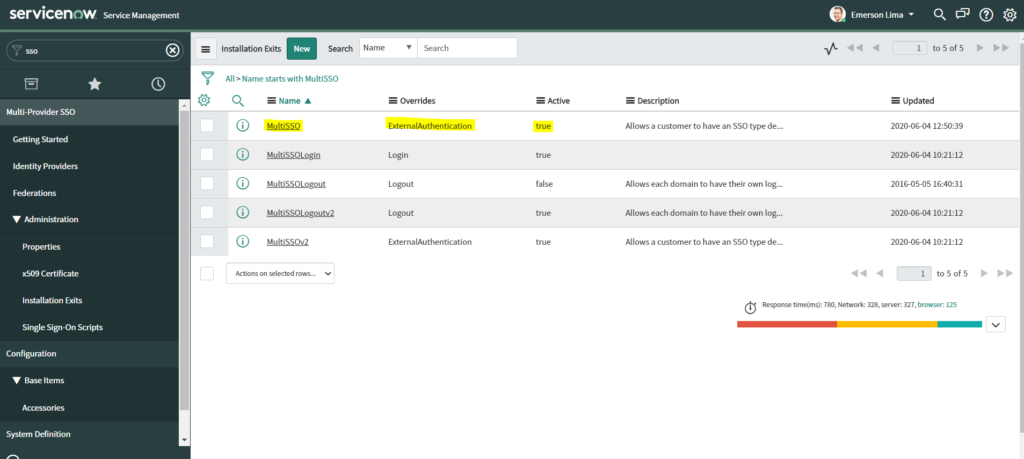
9. Enable ExternalAuthentication
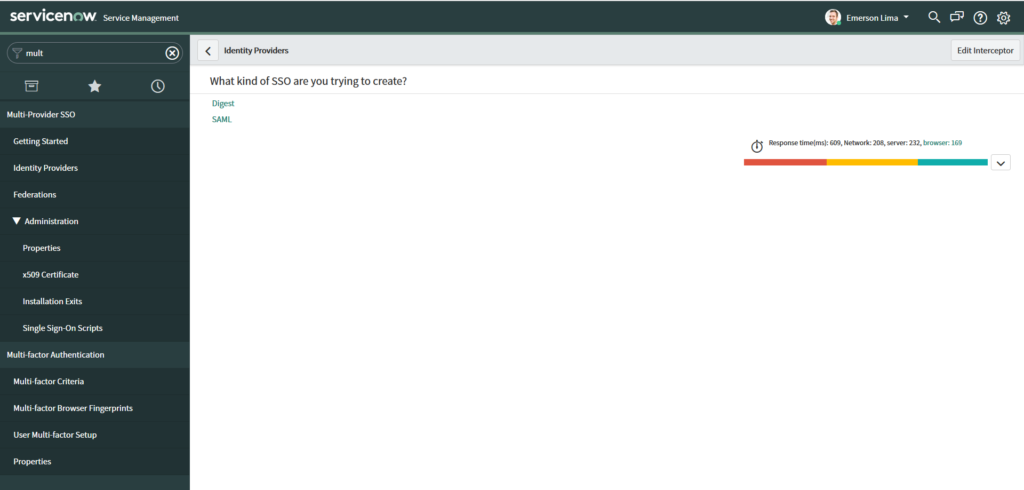
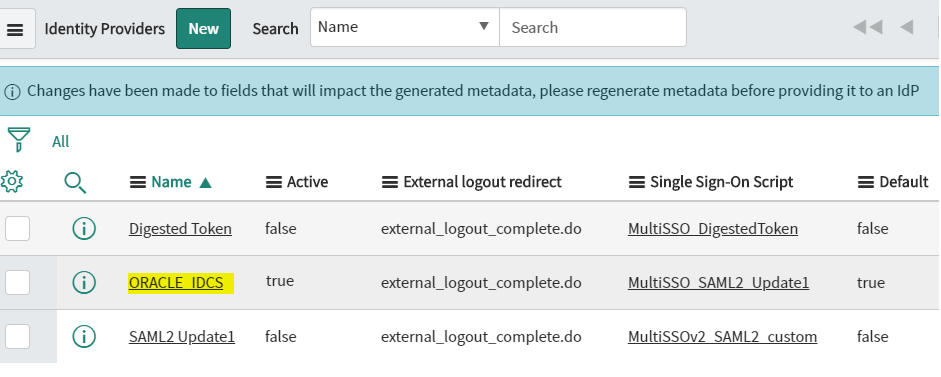
10. Click Identity Providers in the left navigation menu, and then click New:

11. Click SAML
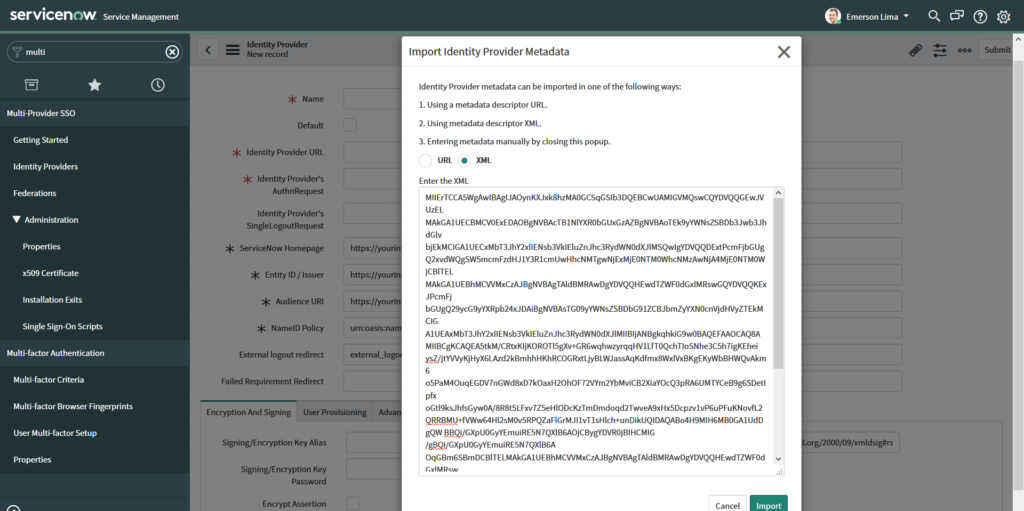
12. Select XML in the Import Identity Provider Metadata dialog box. Paste the IdP Metadata that you accessed earlier, item 4 in “Obtain the Signing Certificate from Identity Provider (IdP) metadata”, and then click “Import”
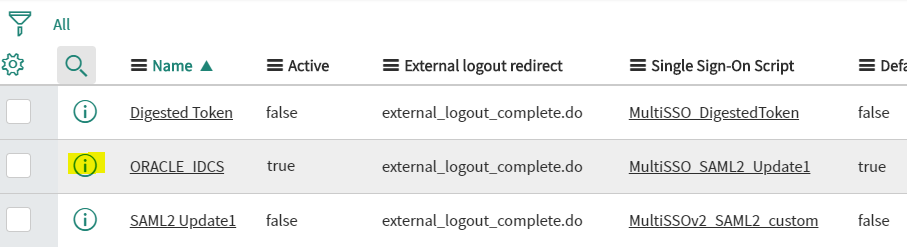
13. Enter the name of the Identity Provider and select the Default check box
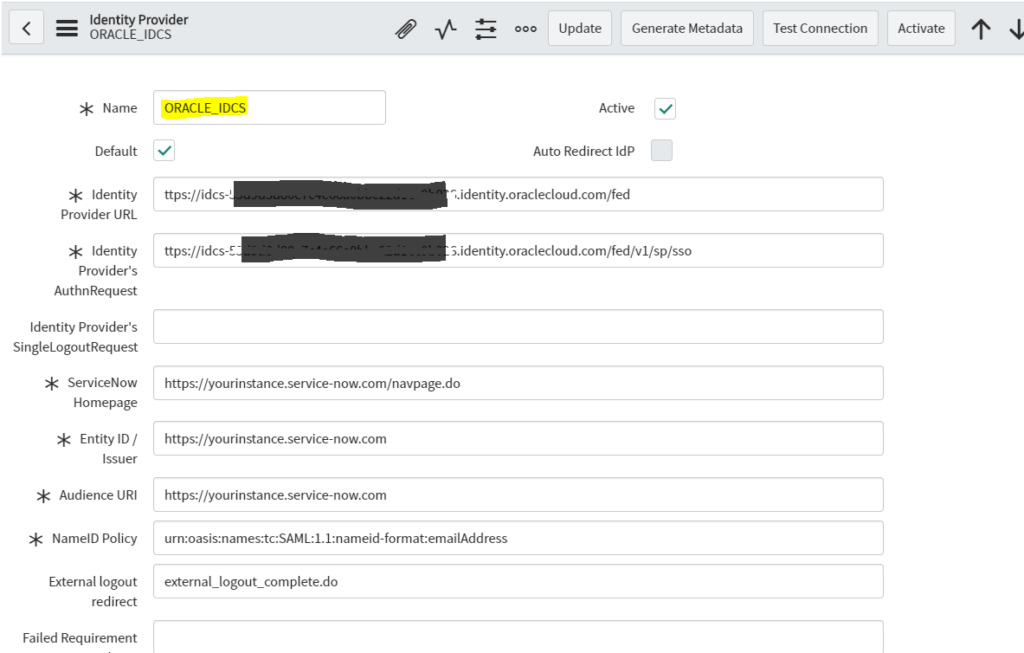
14. Replace the “User Field” value with ‘user_name’ and click the search icon next to the “Single Sign-On Script” filed and Click MultiSSO_SAML2_Update1.

15. Replace the Name ID Policy values as follows: “urn:oasis:names:tc:SAML:1.1:nameid-format:unspecified” and click “Submit”

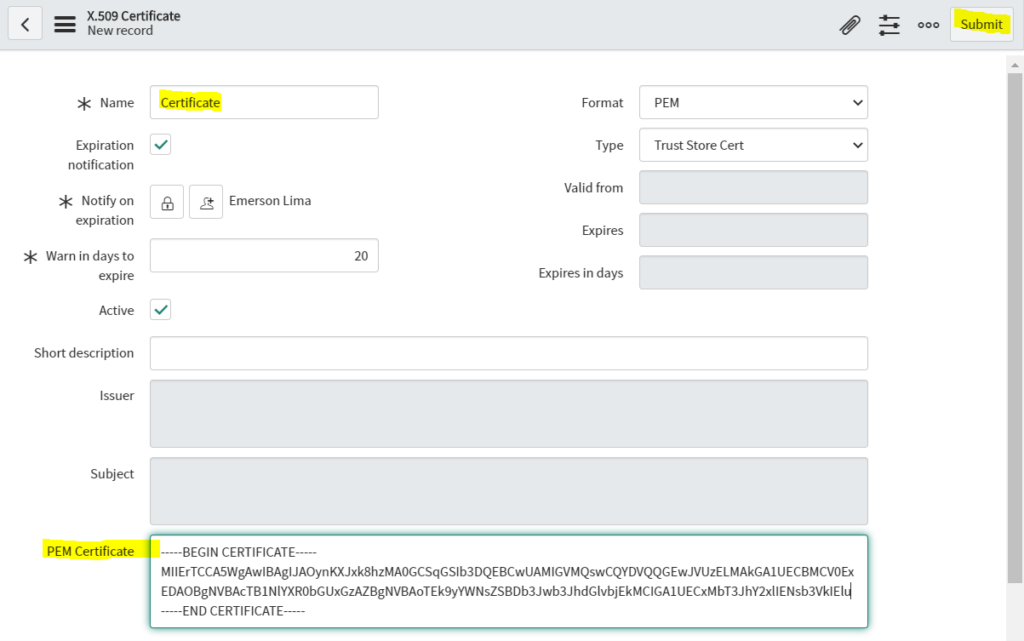
16. Click the newly created Identity Provider scroll down and click New to add a new signing certificate.

17. Type the certificate name, paste the identity provider certificate that you obtain from the metadata and click Submit.
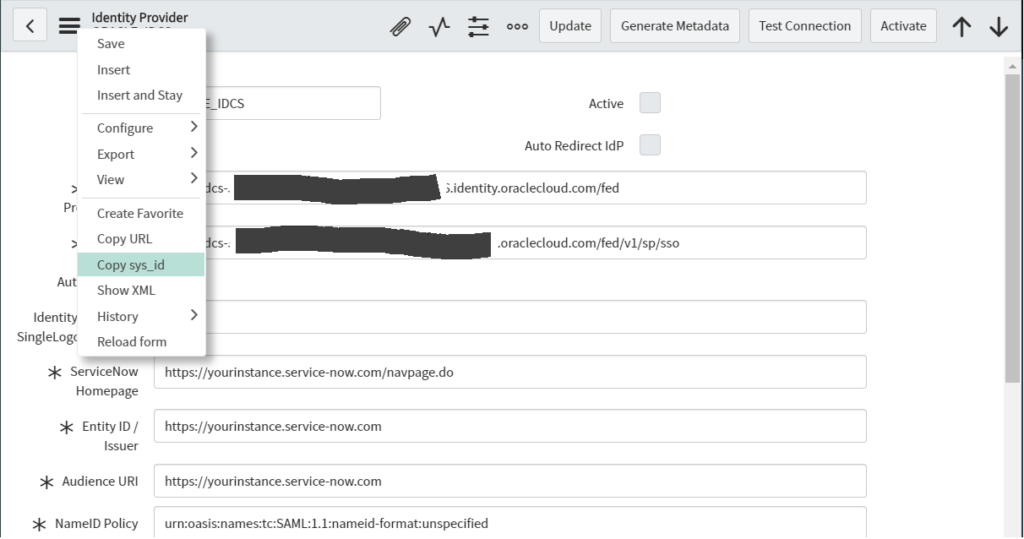
18. Click the information icon of the identity provider.
19. Select Copy sys_id to copy the sys_id of the identity provider
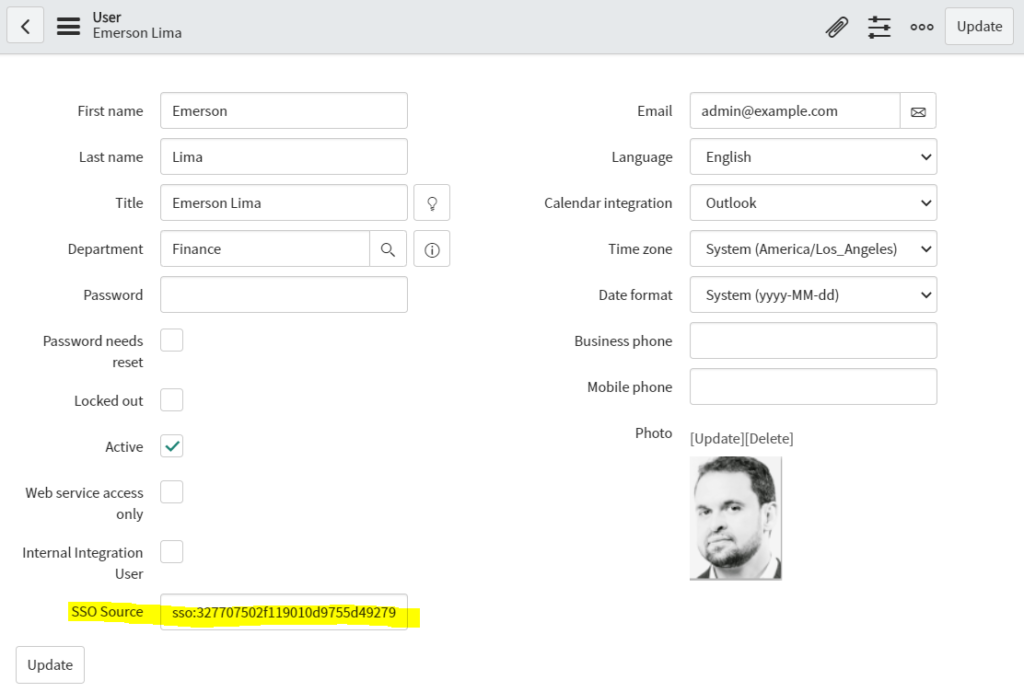
20. Search and click users in the letf navigation menu and Click the user name that must be assigned to the identify provider

21. Locate the “SSO Source” field, enter “sso:”and then append the sys_id to assign the user to the identity provider and click Update.
Register and Activate ServiceNow in Oracle Identity Cloud Service
1. Log in to Oracle Identity Cloud Service as an administrator
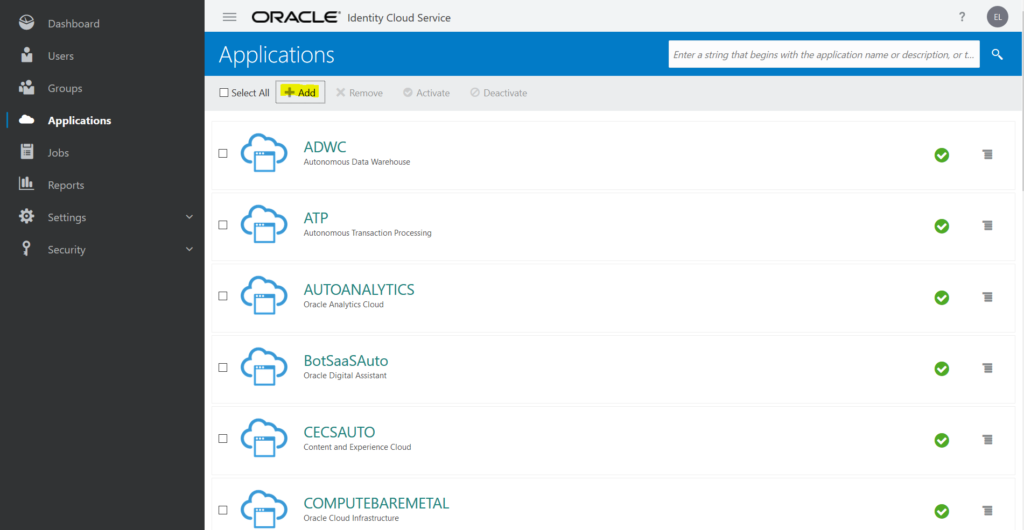
2. Click Application and +Add
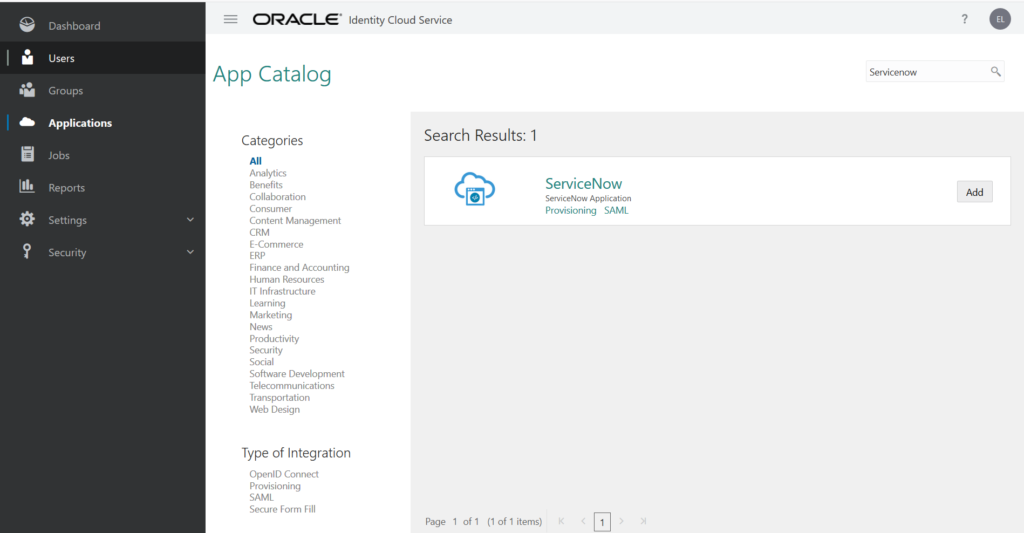
3. Search for ServiceNow in the App Catalog and then click Add.
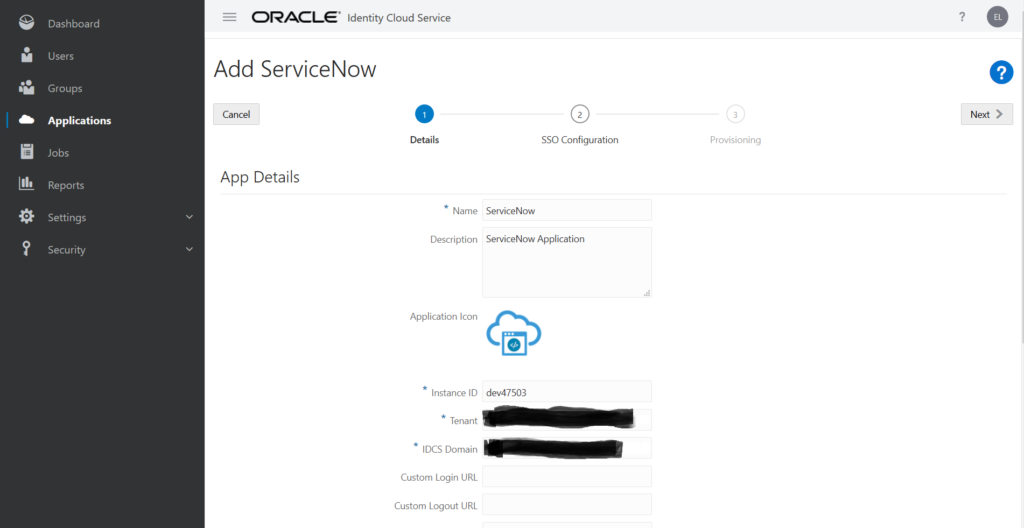
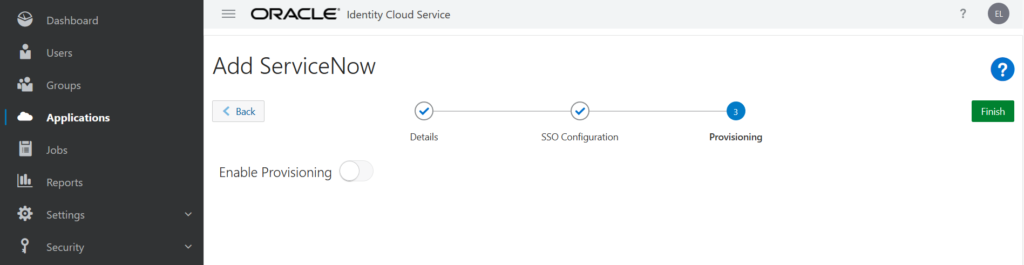
4. Enter Instance ID, that you obtained earlier from ServiceNow, Tenant and IDCS Domain. Click Next, Next and Finish.

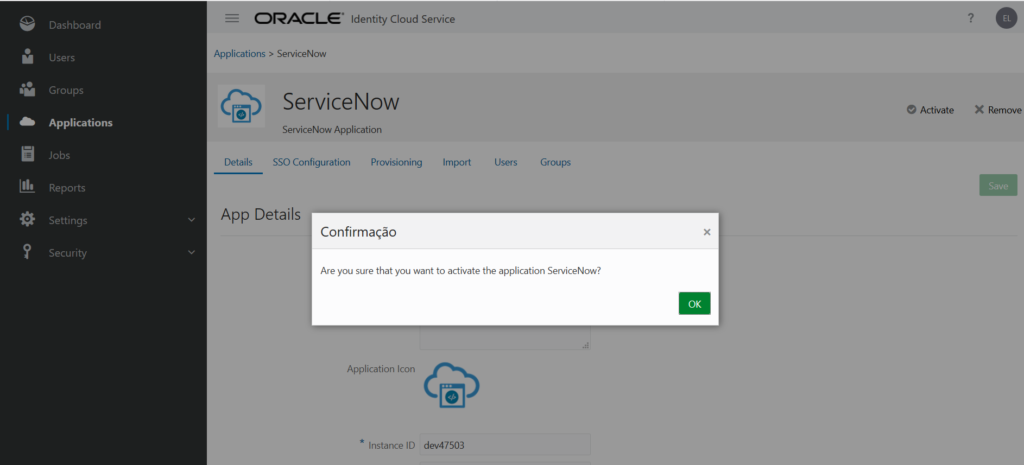
5. Click Activate and then active the application
6. Click the Users tab and then assign users to ServiceNow in Oracle Identity Cloud Service

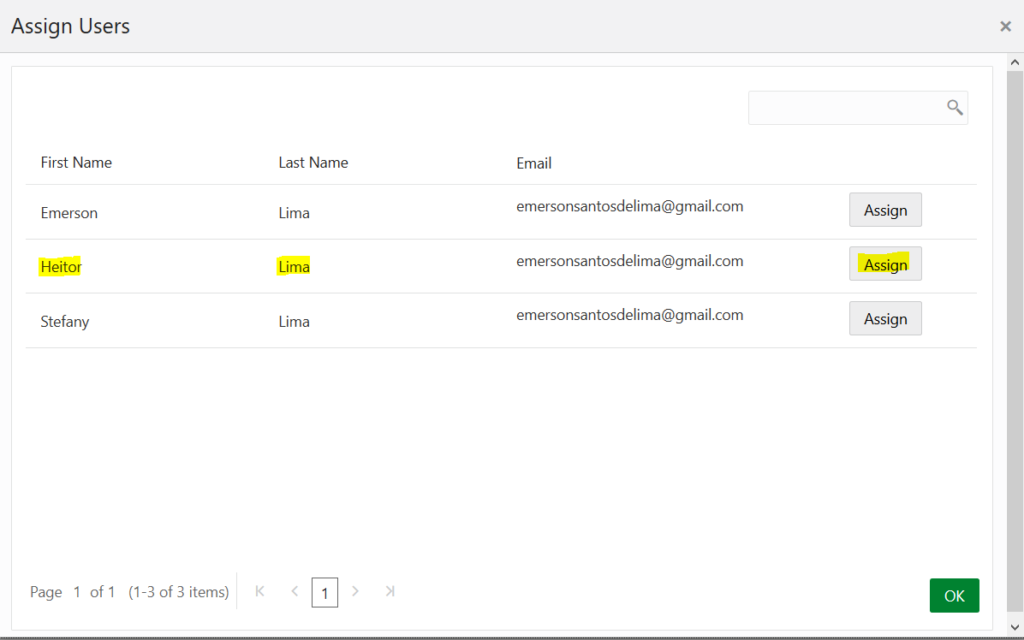
7. Select the required users(s) to provide access to the App and click OK
Verifyng IdP-Init SSO from Oracle Identity Cloud Service and SLO from ServiceNow
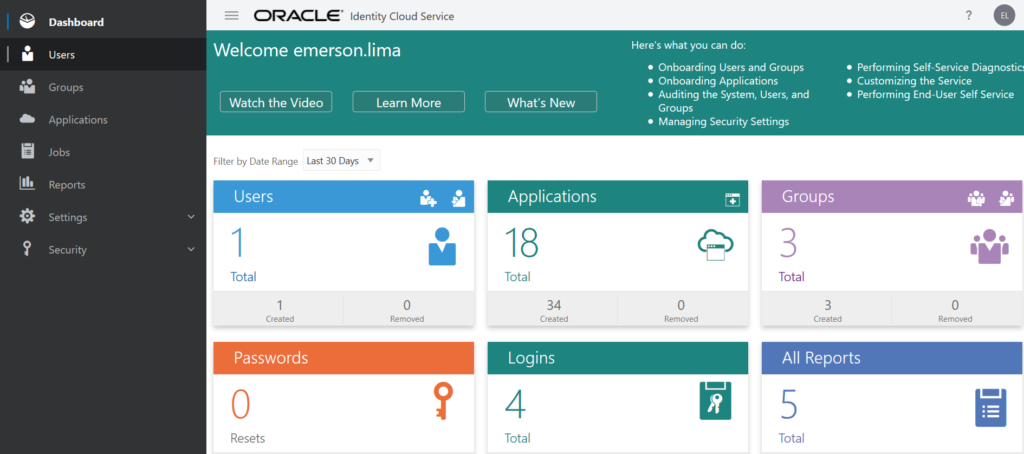
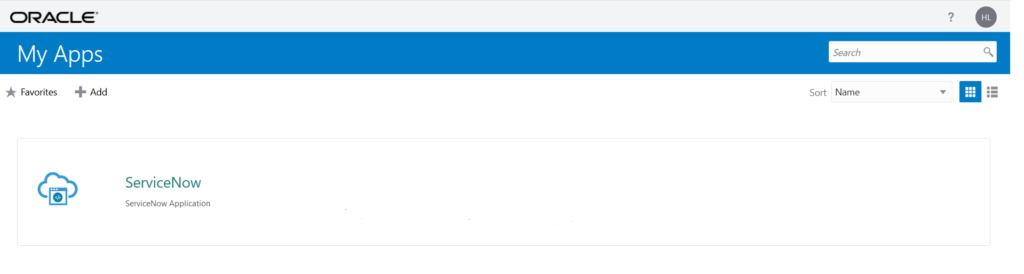
1. Log in to Oracle Identity Cloud Service as the user that you assigned to ServiceNow earlier and Click app ServiceNow
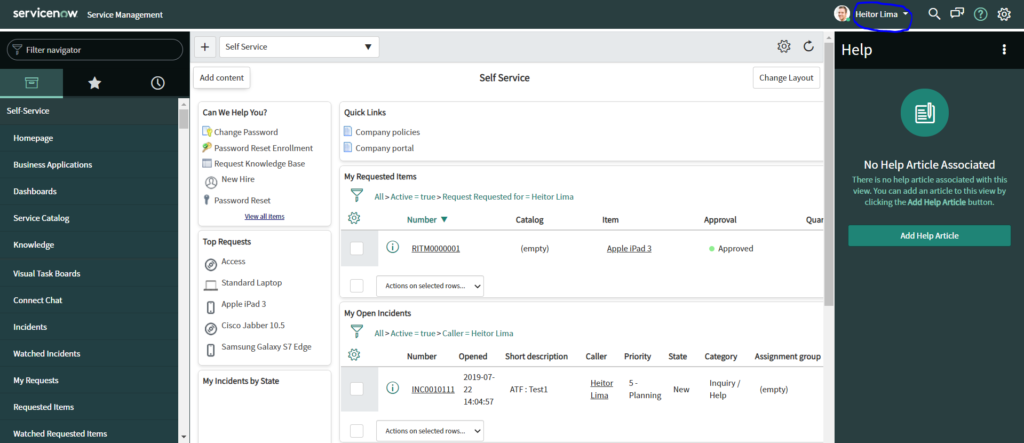
2. Confirm that the same use is logged in to ServiceNow and Oracle Identity Cloud Service
Referências
– Administer SAML user provisioning. Available at https://docs.servicenow.com/bundle/orlando-platform-administration/page/integrate/saml/task/t_AdministerSAMLUserProvisioning.html
– Create a SAML 2.0 configuration using Multi-Provider SSO. Available at https://docs.servicenow.com/bundle/orlando-platform-administration/page/integrate/single-sign-on/task/t_CreateASAML2Upd1SSOConfigMultiSSO.html
– Federando com o Oracle Identity Cloud Service. Available at https://docs.cloud.oracle.com/pt-br/iaas/Content/Identity/Tasks/federatingIDCS.htm
– How to re-enable SAML 2.0 Update 1 after Multi-Provider SSO plugin is installed. Available at https://hi.service-now.com/kb_view.do?sysparm_article=KB0547642
– How to set up SSO Integration with ServiceNow using Oracle Identity Cloud. Available at https://blogs.oracle.com/cloud-platform/how-to-set-up-sso-integration-with-servicenow-using-oracle-identity-cloud
– Oracle Identity Cloud Service – Application Catalog. Available at https://docs.oracle.com/en/cloud/paas/identity-cloud/appcatalog/oraclecloud.html#configuring-sso-for-oracle-cloud
– Update existing SAML 2.0 integration. Available at https://docs.servicenow.com/bundle/orlando-platform-administration/page/integrate/saml/task/t_UpdateExistingSAML2.0Integration.html